Local Kubernetes with K3D and nginx-ingress

Some notes for running a local, multi-node Kubernetes cluster with k3d, and configuring it with nginx-ingress.

This is a useful approach to learn more about how the various components fit together, and to enable local testing without having to spin up a full blown Kubernetes cluster on a cloud provider.

Configure and Run K3d

Create a config file, k3d-conf.yaml.

Notable parts:

  • ports: this will configure the provided nginx loadbalancer to be available on localhost port 8080
  • k3s extraArgs: this will prevent the default svc loadbalancer being deployed to the nodes
apiVersion: k3d.io/v1alpha4
kind: Simple
metadata:
  name: mycluster
image: rancher/k3s:v1.26.0-k3s2
agents: 3
ports:
  - port: 8080:80 # same as '--port 8080:80@loadbalancer'
    nodeFilters:
      - loadbalancer
options:
  k3s:
    extraArgs:
      - arg: --disable=traefik
        nodeFilters:
          - server:*

Then start up the cluster with:

k3d cluster create --config k3d-conf.yaml

Once started, inspecting the pods should show something like the following (note a lack of any traefik loadbalancers as we disabled them):

Install Nginx-ingress

Once the K3d cluster is up and running, install and deploy ingress-nginx via helm:

helm upgrade --install ingress-nginx ingress-nginx --repo https://kubernetes.github.io/ingress-nginx --namespace ingress-nginx --create-namespace

Once installed, inspecting the pods and services should show something like this:

The svclb-ingress-nginx-controller-* pods are created by K3s via a Service controller in reaction to the creation of the ingress-nginx-controller service.

Deploy a Workload

At this point a workload can be deployed, via a Deployment, Service and Ingress.

apiVersion: apps/v1
kind: Deployment
metadata:
  name: nginx-deployment
spec:
  replicas: 3
  selector:
    matchLabels:
      app: nginx
      environment: test
  minReadySeconds: 5
  template:
    metadata:
      labels:
        app: nginx
        environment: test
    spec:
      containers:
      - name: nginx
        image: nginx:1.17
        ports:
        - containerPort: 80
---
apiVersion: v1
kind: Service
metadata:
  name: nginx-service
spec:
  selector:
    app: nginx
    environment: test
  type: ClusterIP
  ports:
  - port: 80
    protocol: TCP
    targetPort: 80
---
apiVersion: networking.k8s.io/v1
kind: Ingress
metadata:
  name: nginx-ingress
spec:
  ingressClassName: nginx
  rules:
    - http:
        paths:
          - path: /
            pathType: Prefix
            backend:
              service:
                name: nginx-service
                port:
                  number: 80

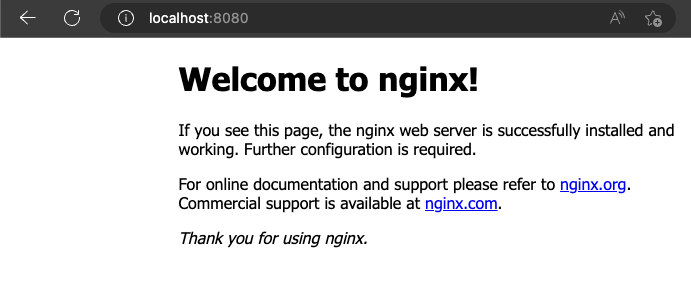
Lastly, navigate to http://localhost:8080 to ensure everything is working:

Resources

Debugging Remote Containers

Following on from my previous posts looking at Remote Containers in Visual Studio Code, I wanted to take a look at debugging.

It turns out this is super straight forward; the configuration for debugging an application inside a container is exactly the same as if you were debugging locally, namely requiring a launch.json file be configured under the .vscode directory.

The example below is for a simple nodejs application:

{
    "version": "0.2.0",
    "configurations": [
        {
            "type": "node",
            "request": "launch",
            "name": "Launch Program",
            "skipFiles": [
                "<node_internals>/**"
            ],
            "program": "${workspaceFolder}/index.js"
        }
    ]
}

With this in place, simply start your application from either the 'Run' tab or the command palette (Shift + Ctrl + P, Debug), then set breakpoints as you please:

VS Code provides a full-blown debug environment, with breakpoints, code stepping, variable watches etc all supported.

A handy hint, VS Code supports intellisense in launch.json; pressing Ctrl + Spacebar will bring up a list of suggestions which will generate the appropriate entries.

That's really all there is to it. Further documentation on debugging Node in VS Code can be found here, including how to attach rather than launch, and how to configure 'skip files' to avoid certain source files.

Enjoy!

Docker Compose with Remote Containers

My last post detailed developing inside containers with Visual Studio, making it possible to use existing docker images as a fully fledged development environment.

This post will dive a bit deeper, looking at how we can use Docker Compose to spin up multiple containers to support scenarios where we might want to make use of additional services or APIs.

Step 1: Move to Docker Compose

First, we will update our .devcontainer configuration to use docker-compose, instead of just a straight DockerFile. There are three components to this:

DockerFile

In this case the docker file defines the container inside which we will do our development; this remains unchanged in this simple example:

ARG VARIANT="14-buster"
FROM mcr.microsoft.com/vscode/devcontainers/javascript-node:0-${VARIANT}
devcontainer.json

This file controls how Visual Studio Code will handle remote containers for development. It is slightly different to the previous example as it will refer to a docker-compose file:

{
	"name": "Node.js",
	"dockerComposeFile": "./docker-compose.yml",
	"service": "app",
	"workspaceFolder": "/workspace",

	// Set *default* container specific settings.json values on container create.
	"settings": { 
		"terminal.integrated.shell.linux": "/bin/bash"
	},

	// Add the IDs of extensions you want installed when the container is created.
	"extensions": [
		"dbaeumer.vscode-eslint"
	],
	"remoteUser": "node"
}

Some of the important items to note:

  • dockerComposeFile: path to the docker-compose file
  • service: name of the container from the docker-compose file which will be used as the dev container
  • remoteUser: required when container is configured with non-root user
docker-compose.yaml

Finally, the docker-compose.yaml file defines the containers and services we want to spin up. To start this is just replicating the dev container:

version: '3'

services:
  app:
    build: 
      context: .
      dockerfile: Dockerfile
      args:
        VARIANT: 14

    volumes:
      - ..:/workspace:cached

    # Overrides default command so things don't shut down after the process ends.
    command: sleep infinity

    # Use a non-root user for all processes.
    user: node

With these elements in place, it should be possible to execute a container rebuild:

Step 2: Add Additional Services

Now that we are using docker compose, we can simply update docker-compose.yaml to include the additional containers we want, like this:

version: '3'

services:
  app:
    build: 
      context: .
      dockerfile: Dockerfile
      args:
        VARIANT: 14

    volumes:
      - ..:/workspace:cached

    # Overrides default command so things don't shut down after the process ends.
    command: sleep infinity

    # Runs app on the same network as the database container, allows "forwardPorts" in devcontainer.json function.
    network_mode: service:deepstack-ai

    # Use a non-root user for all processes.
    user: node

  deepstack-ai:
    image: deepquestai/deepstack:latest
    volumes:
      - localstorage:/datastore
    environment:
      - VISION-DETECTION=True

volumes:
  localstorage:

After executing another rebuild, you should see VS Code pull down the appropriate images, and spin everything up, leaving you with both containers running and ready to use:

Summary

Docker-compose can be used with Visual Studio Code's remote containers to make it possible to spin up multiple containers as needed. This is useful when want to build on existing services, such as a database or AI API etc.

Developing in Containers with Visual Studio Code

Visual Studio Code now offers the ability to use a docker container as a fully fledged development environment with the introduction of the Remote Containers extension.

Workspace files are made accessible from inside a container which can also host the tools relevant to the development environment, leaving VS Code acting as a remote UI to enable a 'local quality' development experience:

Container Architecture

The obvious benefit here is the ability to very rapidly spin up a development environment through the use of pre-existing containers which already provide all required components.

Starting Up

First thing to do is create the config files that will tell VS Code how to configure the environment; this can be done by executing 'Add Development Container Configuration Files' (Ctrl + Shift + P):

This will create devcontainer.json and Dockerfile files under .devcontainer within the workspace.

The Dockerfile defines the container that Code will create and then connect to for use as a development environment. A bare bones Dockerfile for use with a Node app may look like this:

FROM node:slim
USER node

devcontainer.json defines how VS Code should work with a remote container. A simple example below shows how to reference the Dockerfile:

// For format details, see https://aka.ms/devcontainer.json. For config options, see the README at:
// https://github.com/microsoft/vscode-dev-containers/tree/v0.140.1/containers/typescript-node
{
	"name": "TriggerService",
	"build": {
		"dockerfile": "Dockerfile",
	},

	"settings": { 
		"terminal.integrated.shell.linux": "/bin/bash"
	},

	"extensions": [
		"dbaeumer.vscode-eslint",
		"ms-vscode.vscode-typescript-tslint-plugin"
	],

	"remoteUser": "node"
}

With both of these files in place, VS Code will prompt to re-open in the container environment (or use the command palette to execute 'Reopen in Container'):

Dev Container Progress Notification

Once started up, an indicator in the bottom left shows that VS Code is currently connected to a container:

Create a Simple App

At this point VS Code is now connected to the node:slim container as configured in the Dockerfile.

Because this image provides everything needed to start developing a Node application, we can start by using npm to install Express:

npm init -y
npm install express

Then create index.js under the src folder:

const express = require( "express" );
const app = express();
const port = 8080;

// define a route handler for the default home page
app.get( "/", ( req, res ) => {
    res.send( "Hello world!" );
} );

// start the Express server
app.listen( port, () => {
    console.log( `server started at http://localhost:${ port }` );
} );

Next we need to update the package.json file to set the main entry point and start command:

{
  "name": "test-app",
  "version": "1.0.0",
  "description": "",
  "main": "src/index.js",
  "scripts": {
    "start": "node .",
    "test": "echo \"Error: no test specified\" && exit 1"
  },
  "keywords": [],
  "author": "",
  "license": "ISC",
  "dependencies": {
    "express": "^4.17.1"
  }
}

Now executing the following command from the terminal will start up the application inside the container:

npm run start

The key thing to note here is that we stood up this simple Node app without ever having to actually install Node on our host system; everything was pulled down via the node:slim docker image.

At this point the application is exposed on port 8080, so can be accessed at http://localhost:8080.

What's Next?

We have only covered enough here to get up and running, barely scratching the surface of what can be done with remote containers.

Next up, debugging from inside a container, and using docker compose to handle spinning up multiple containers.

Vagrant Provisioning with Ansible

Messing around with Vagrant again, this time using Ansible to automate configuration post deployment.

Ansible is billed as an automation platform which makes it easier to deploy systems and applications. It does this through a scripting framework which supports a wide range of functionality covering deployment and configuration.

Vagrant Config

To define which Ansible playbooks should be run, the vm.provision config can be used in a Vagrantfile:

  config.vm.define "vm1" do |vm1|  
vm1.vm.box = "centos/7"
vm1.vm.hostname = "vm1"
vm1.vm.network "private_network", ip: "192.168.10.10"

vm1.vm.provision "docker", type:"ansible" do |ansible|
ansible.playbook = "docker-playbook.yml"
end

vm1.vm.provision "kubernetes", type: "ansible" do |ansible|
ansible.playbook = "kube-playbook.yml"
end
end

A Simple Playbook

Ansible uses the concept of playbooks to define a set of repeatable deployment steps.

This example deploys Docker on a CentOS system (should be saved as docker-playbook.yml in same directory as the Vagrantfile):

- hosts: all
become: yes
tasks:
- name: install docker dependancies
yum:
name: "{{ packages }}"
vars:
packages:
- yum-utils
- device-mapper-persistent-data
- lvm2

- name: Add Docker repo
get_url:
url: https://download.docker.com/linux/centos/docker-ce.repo
dest: /etc/yum.repos.d/docker-ce.repo
become: yes

- name: install docker
yum:
name: "{{ packages }}"
vars:
packages:
- docker-ce
- docker-ce-cli
- containerd.io

- name: Start Docker service
service:
name: docker
state: started
enabled: yes

- name: Add user vagrant to docker group
user:
name: vagrant
groups: docker
append: yes

Running

Running 'vagrant up' will cause all configured provision entries to run:

$ vagrant up
Bringing machine 'vm1' up with 'virtualbox' provider…
<snip>
==> vm1: Configuring and enabling network interfaces…
==> vm1: Rsyncing folder: /home/rich/vagrant_storm/ => /vagrant
==> vm1: Running provisioner: file…
==> vm1: Running provisioner: shell…
vm1: Running: inline script
==> vm1: Running provisioner: docker (ansible)…
vm1: Running ansible-playbook…
PLAY [all] *
TASK [setup] ***
ok: [vm1]
TASK [install docker dependancies] ***
changed: [vm1]
TASK [Add Docker repo] *
changed: [vm1]
<etc...>

Provisioning Again

Provisioning can also be run independently once the VM(s) are up

vagrant provision

By naming each provision entry, it's also possible to run a specific item:

$ vagrant provision --provision-with kubernetes
==> vm1: Running provisioner: kubernetes (ansible)…
vm1: Running ansible-playbook…
PLAY [all] *
TASK [setup] ***
ok: [vm1]
TASK [add Kubernetes' YUM repository]
ok: [vm1]
TASK [install kubernetes]
ok: [vm1]
TASK [start kubelet] ***
changed: [vm1]
PLAY RECAP *
vm1 : ok=4 changed=1 unreachable=0 failed=0

Summary

Making use of Ansible along with Vagrant provides a super-fast, repeatable way to bring up a system with a defined configuration.

This will form the basis of an automation system for end-to-end testing, which future posts will build on.

Vagrant Networking Basics

Vagrant supports three basic types of networking:

  • Port Forwarding / NAT
  • Private Network
  • Public Network

By default, no networking is enabled (outside of Vagrant's internal management mechanism), so one of these must be configured in the Vagrantfile to make the VM accessible by network.

Port Forwarding / NAT

The most basic network configuration forwards traffic from the host machine to the guest VM only on specific ports. By default only TCP is forwarded; config looks like this:

Vagrant.configure("2") do |config|
  config.vm.network "forwarded_port", guest: 80, host: 8080
end

Vagrant will also detect configuration conflicts where the same port is in use multiple times, and will prevent deployment of such a config.

Private Network

Private networks provide host only access to the guest VM; that is the networking is not bridged, and will not be accessible outside of the host VM.

Config looks like this when assigning an address via DHCP:

Vagrant.configure("2") do |config|
  config.vm.network "private_network", type: "dhcp"
end

Public Network

Public networks provide access to the guest VM which is available externally to the host system. Depending on provider, this is achieved through bridging, making the guest VM as public as the host machine is.

By default, DHCP is used for assigning addresses; config looks like this:

Vagrant.configure("2") do |config|
  config.vm.network "public_network"
end

Static IPs

The 'ip' config setting can be used to assign specific IPs for both private and public networks:

config.vm.network "private_network", ip: "10.0.0.100"

Note that there appears to be a bug in Vagrant 1.9.1 that prevents static IPs being applied properly in some RHEL based images. A workaround is to force the interface to come up by adding an additional provisioning line in the Vargrantfile:

config.vm.provision "shell", inline: "ifup eth1", run: "always

More Reading

Vagrant provides many more options for networking, with some features varying by provider.

Networking docs can be found here for more detail.